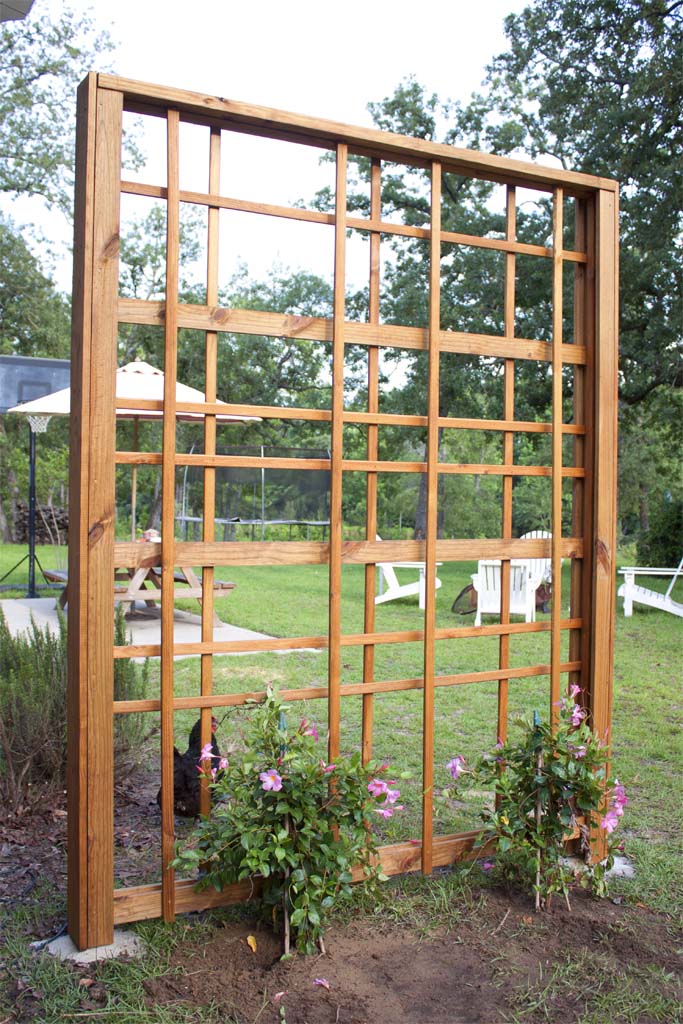
How to build a diy wooden garden trellis for climbing plants

Alright, you want to build a wooden garden trellis for your climbing plants? Awesome! It's a super satisfying project that adds a touch of vertical greenery to your garden. Plus, it's way cheaper than buying one from a store. I'll walk you through the whole process, step by step.
First Things First: Let's Talk Materials
You'll need some basic tools and materials to get started. Think of this as your garden project toolbox.
Wood: Choose your weapon, or rather, your wood! I recommend pressure-treated lumber for outdoor use, especially if you're near the ground. You can get cedar or redwood too, they're naturally resistant to rot. You'll need:
Four upright posts: These are your trellis's backbone. You'll probably want them to be about 6 feet tall.
Horizontal rails: These will be attached to the posts to create the trellis's framework. Think of them as the stepping stones for your climbing plants.
Hardware:
Screws: Use screws that are long enough to go through the wood and into the posts.
Brackets: These will help you secure the horizontal rails to the posts, especially if you're using thinner rails.
Optional: Stakes or post anchors: If you want your trellis to stand super strong, especially in windy areas, these are your best friends.
Tools:
Saw: To cut the wood to size.
Drill: To make pilot holes for the screws. (This is super important to prevent splitting the wood.)
Level: To make sure your trellis is nice and straight.
Measuring tape: To make sure your cuts are perfect.
Pencil: To mark your wood where you need to cut and drill.
Safety glasses: Because safety is always cool, right?
Alright, Let's Build This Trellis!
1. Planning the Trellis: This is where you get to unleash your inner garden artist. Decide on the size and shape you want. You can go with a simple, rectangular design or get fancy with a curved or diamond-shaped trellis.
2. Cutting the Wood: This is where your saw comes in handy. Measure carefully, and use the saw to cut the posts and horizontal rails to the sizes you need.
3. Assembling the Frame: Lay the posts down on a flat surface. You'll need to decide whether you want your trellis to stand upright or lean against a wall.
Upright Trellis: Attach the horizontal rails to the posts using screws or brackets. Start by securing the rails to the posts, making sure they're level, then you'll add additional rails as needed.
Wall-Mounted Trellis: If you're mounting your trellis to a wall, start by attaching the rails to the posts in the same way as above. Then, secure the posts to the wall using brackets.
4. Extra Support: If you want your trellis to be super sturdy, especially in windy areas, you can add extra support with diagonal braces or use stakes or post anchors.
5. Finishing Touches: You can stain, paint, or seal the wood to protect it from the elements and give your trellis a personalized look.
6. Planting Time! The fun part! Choose your climbing plants, plant them near the base of the trellis, and watch them grow and flourish.
Tips and Tricks to Make Your Trellis Epic
Spacing: Leave about 6-8 inches between the horizontal rails to give your plants plenty of room to grow.
Durability: Consider using thicker wood for the posts to make your trellis extra sturdy.
Creative Designs: Get creative with the shapes and sizes of your trellis! You can create curves, triangles, and even arcs.
Personalization: Add a touch of your personal style with paint, stain, or even decorative elements like lattice or metalwork.
Maintenance: Give your trellis a good clean now and then. Remove any dead plant material, and check the wood for signs of wear and tear.
Choosing the Right Climbing Plants:
Vines: These are your classic climbing plant, like clematis, morning glory, or honeysuckle.
Creepers: These plants spread horizontally, so they're great for covering ground or creating a green wall. Try creeping fig or Boston ivy.
Ramblers: These plants are free-spirited and climb up and over structures, like roses, wisteria, or passionflower.
Climbers: These plants need some help getting started, so they're great for a trellis. Try climbing hydrangea or climbing beans.
So, what are you waiting for? Gather your materials, put on your favorite playlist, and get ready to build your very own wooden garden trellis. It's a fun and rewarding project that will make your garden look absolutely amazing!
0 Response to "How to build a diy wooden garden trellis for climbing plants"
Post a Comment